 Docs
DocsUsage
First steps with Rclone UI
This guide will help you get started with Rclone UI.
Opening the toolbar
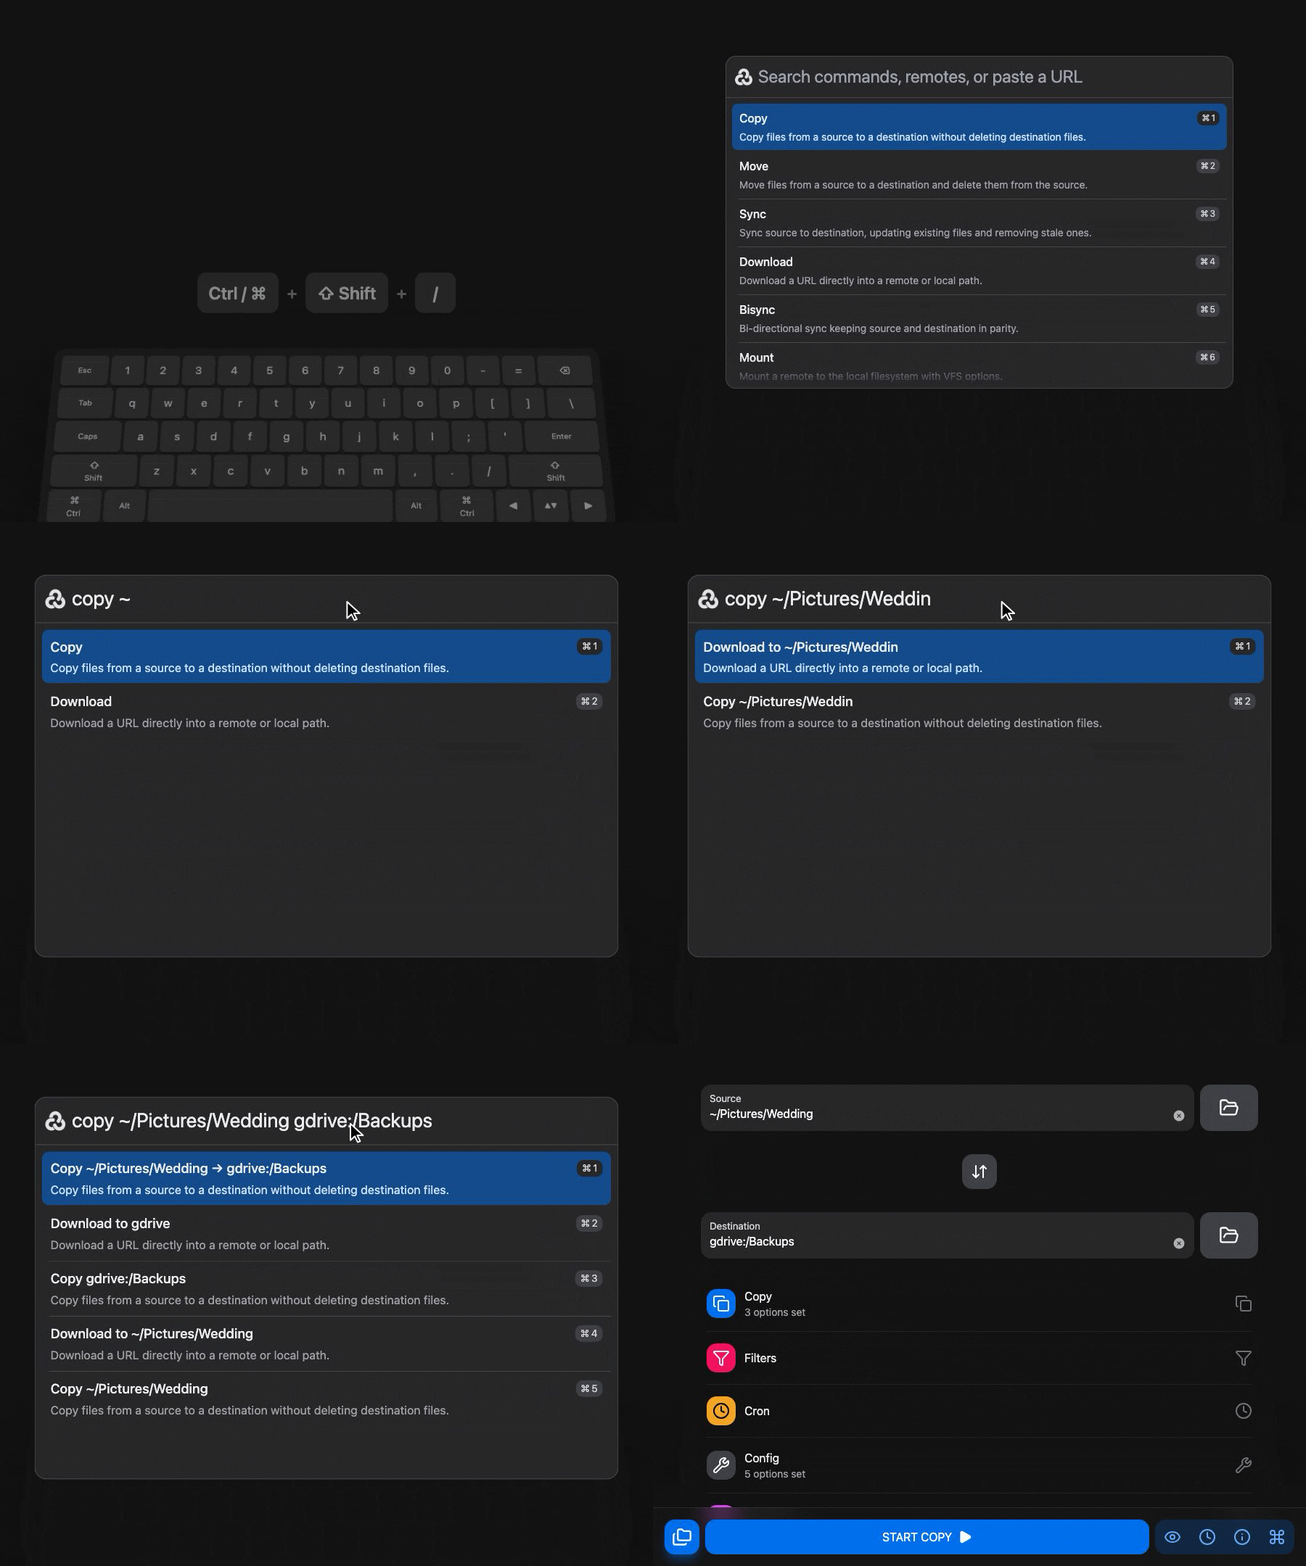
This is the central command center of Rclone UI, the cockpit.
It's a full-featured command palette with auto-completion and a history of your most used commands.
You trigger it with a customizable shortcut, the default is Ctrl+Shift+/ on Windows/Linux and Cmd+Shift+/ on macOS.
If you want to change the shortcut, you can do so in the Settings > Toolbar section.
Running your first command
The first thing you'll want to do is run a command.
You can do this by typing the command you want to run in the toolbar and pressing enter.
Let's say you want to copy a file from your local machine to your Google Drive.
You can write:
Copy
# This will open the Copy window
copy C:\Local\path\to\source myRemote:/path/to/destination
# This will open the Copy window with the source and destination paths filled in for youOnce the window is open, you can further customize the command before running.
Saving the command as a template
You can save the command as a template to use it later.
To do this, click on the "Save" button in the toolbar and select "Save as template".
You can then use the template by clicking on it in the toolbar and it will be filled in for you.
Checking on the transfer
Once started, the command runs in the background. Open the toolbar and type "Transfers" to see every job, its progress and its files, or press "VIEW TRANSFERS" in the window you started it from.
To run the command by itself at a set time, the Cron section of the window turns it into a schedule. See Schedules.
Browsing your data
Type "Browse" and a remote's name in the toolbar to open the Commander: two panels, each showing a remote or your local disks, with drag and drop between them, previews, batch rename and folder comparison. The Operations pages cover each command in detail.
How is this guide?